
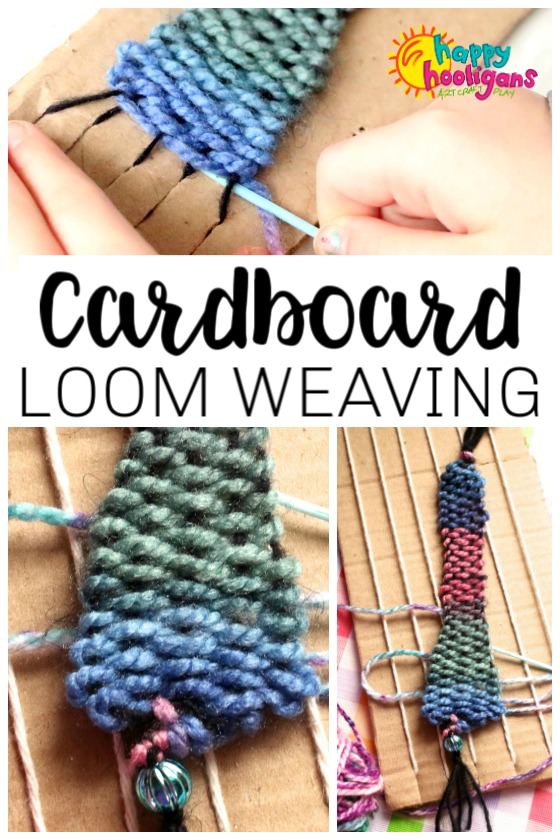
Cardboard loom weaving is fun and easy, and kids will be amazed with the projects they can make using just a piece of cardboard and some yarn scraps. In this post, you’ll learn how to make a cardboard weaving loom, how to weave on it, and how to take your finished weaving project off the loom.
Great Weaving Activity for Beginners
The other day I taught my daycare kids how to weave on a cardboard loom. They’ve shown a real interest in yarn crafts lately, so I’m introducing them to some of the classics that I loved when I was a kid.
Update: After mastering loom weaving, the hooligans have done all kinds of creative weaving projects. You can see them all here.
We’ve done a lot of lacing and weaving activities over the years but this was the hooligans’ first time weaving on an actual loom. They were surprised by how quick and easy it was to do and they were thrilled with the way their projects turned out.
Loom weaving is a relaxing activity that kids can do in their down-time or while watching t.v. or even to pass the time in the car. Most kids don’t get the opportunity to learn these classic, old-fashioned hand-crafts anymore, so I’m thrilled that my hooligans are so keen to learn them.

What can you make on a Cardboard Loom?
You can make all kinds of weaving projects on a homemade loom. Some simple projects for kids are:
- scarves and bracelets
- wall hangings
- pot holders and placemats
- bookmarks
I plan to introduce the kids to circular weaving next, so I’ll share that process and the photos too!
For now, let’s make our cardboard loom and get weaving!

How to Make a Cardboard Weaving Loom
Supplies
To Make Your Loom
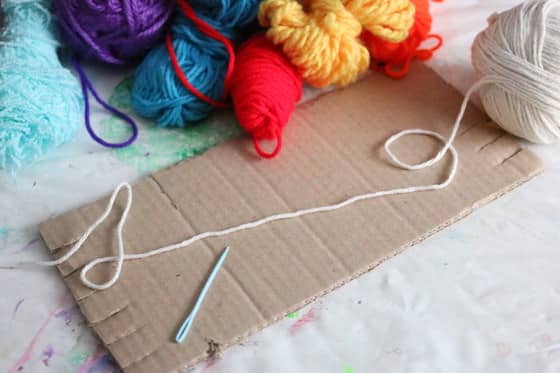
- Cut a piece of cardboard to the length and width that you want your loom to be.
- Snip evenly spaced cuts across one end of the loom. You can make as many cuts as you like, but be sure to space them evenly.
- Make identical cuts at the other end of your loom. You can use a pencil and ruler to line them up perfectly, but we just eyeballed ours.
Warp and Weft
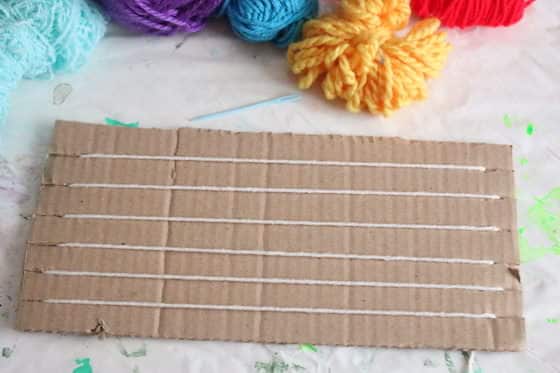
- Next, you’ll need to make your warp. The warp refers to the strings that run lengthwise on a weaving loom while the weft refers to the yarn that you weave horizontally over and under these strings.
- To create your warp, secure a long piece of yarn in the first slit on one of the ends of your loom. Tape the tail to the back of your loom.
- Carry this piece of yarn down the front of the loom to the matching slit at the bottom, and bring it back up behind the loom the second slit. Pull it down the front of the loom again, and up the back to the 3rd slit. Continue until you reach the end of the loom.
- Cut your yarn and tape that tail to the back of the loom.

Now you’re ready to weave!
How to Weave on a Cardboard Loom
To begin weaving, thread a 1-2 foot length of yarn through your sewing needle. Keeping it under 2 feet will minimize tangles and frustration.
Starting at one end of the loom, weave your needle under and over the warp strings on your loom. Continue back and forth across the loom until the yarn runs out. Finish at an edge and leave the tail hanging loosely at that edge.
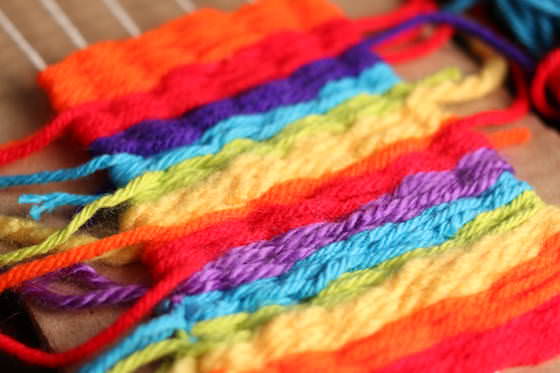

Begin where you left off, with a new colour or with more of the same yarn. Leave a little tail when you begin with this new piece of yarn. You’ll tie the tails together when you finish your project.
Don’t pull too tight…
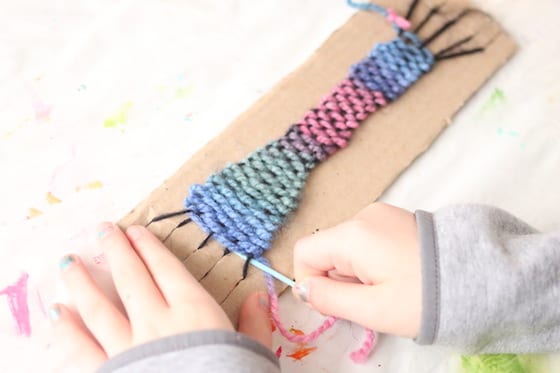
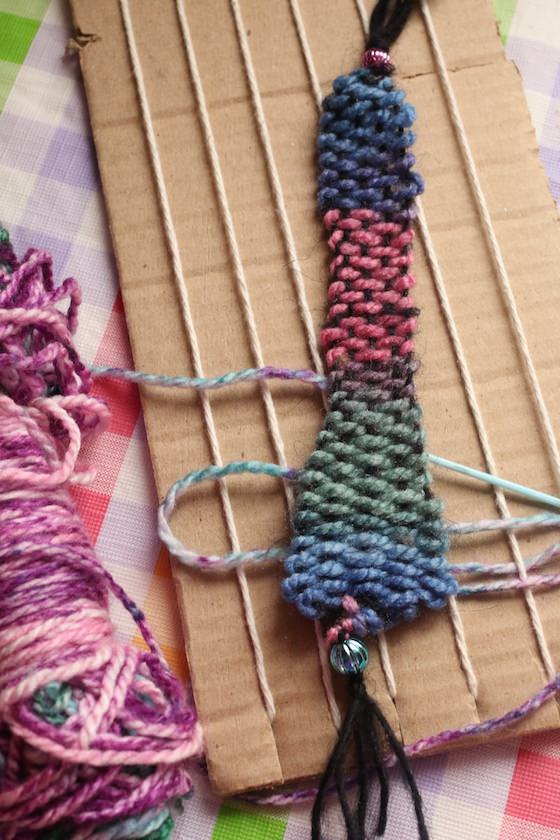
Try not to pull your yarn too tight as you’re weaving, or the shape of your project will become a little wonky. In the next photo, you’ll see how the project is narrower in the middle than at the edges. That’s totally understandable, considering it was this hooligan’s first weaving experience, but that’s what I mean when I say “a little wonky”.
I LOVE her finished project though. We added beads to the ends, and turned it into a bookmark.


To keep your rows free of gaps:
As you work, gently use your fingers to push your rows together so they’re nice and snug.
Continue weaving until your project reaches a length that you’re happy with or until you reach the end of your loom. Cut the yarn, leaving a little tail.
How to take Your Weaving Off the Loom
Taking your weaving off the loom is easy, but you’ll need to take care of the loose ends on the sides of your project first. If you’re striving for a polished look, you can weave the tails into the stitches that run down the end of your woven piece. If you’re not too fussy just knot them together and snip off the excess yarn.
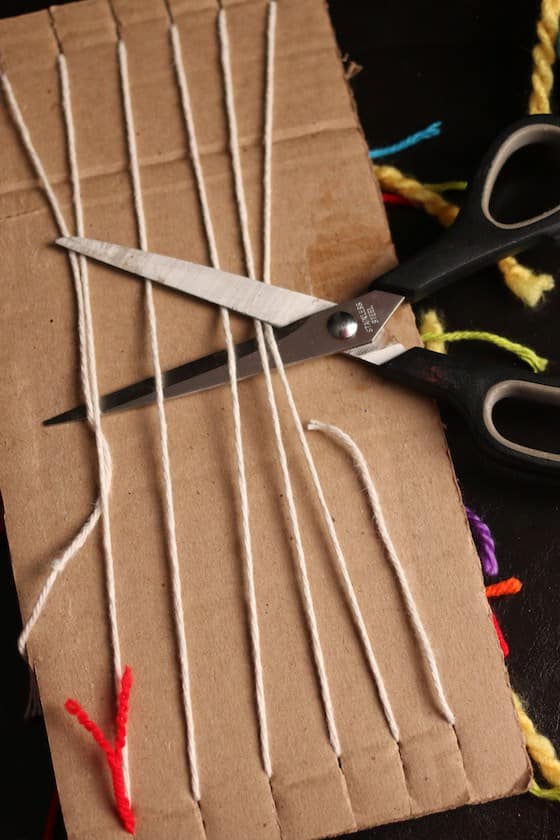

To remove your project from the loom, through the warp strings on the back of your loom, and gently pry the strings out of the notches in the cardboard.
You’ll have 2 tails that need to be dealt with: the tail that you started your project with and the tail that you finished with. Tie these to the closest warp strings.
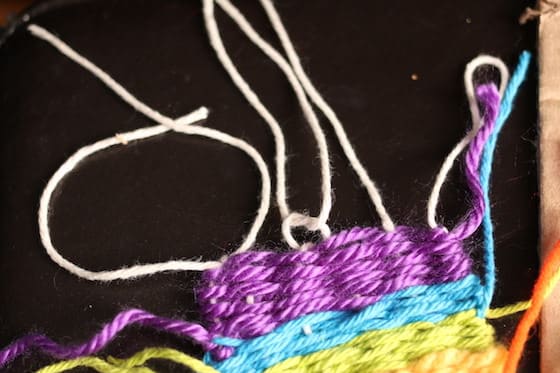

Finish by tying your warp strings together in two’s (see above photo).
And that’s all there is to weaving on a cardboard loom! Wasn’t that easy?
What will your kids turn their woven piece into? And what will they make next?
Hopefully they continue to have lots of fun with their homemade weaving loom. May it be the start of a life-long love affair with good old-fashioned fibre crafts.
Your kids may also like:
Get the 3-5 Playful Preschool e-Book!
25+ Preschool activities by 25 bloggers, 10 printables, PLUS 50 links to activities not featured in the book.
Click here to download your copy today
Follow the Hooligans on Facebook!


Jackie is a mom, wife, home daycare provider, and the creative spirit behind Happy Hooligans. She specializes in kids’ crafts and activities, easy recipes, and parenting. She began blogging in 2011, and today, Happy Hooligans inspires more than 2 million parents, caregivers and Early Years Professionals all over the globe.


