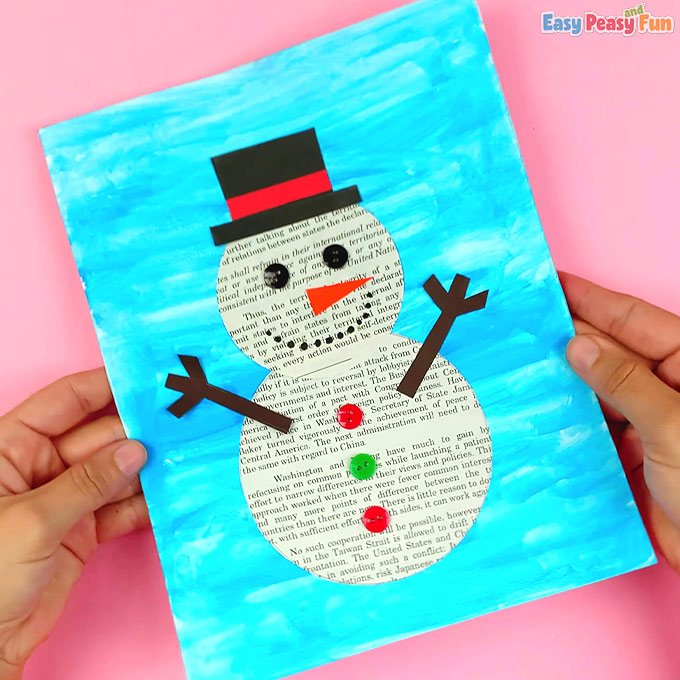
Art and recycling go hand in hand! With just a couple of supplies, your kids will be able to make this fun newspaper snowman art idea. What we love about this project is that it allows a lot of freedom, as it can easily be modified to include all kinds of other scrap materials and not just the supplies we used.
Related: winter crafts for kids
*This post contains affiliate links*
While you don’t need a template to make this arts and crafts project, you can use one of our free printable snowman outline templates, especially if you are making this as a quick project in the classroom.

If you don’t have the black and white newspaper, have the kids paint over it with white paint. It will still keep that newspaper charm.


How to Make the Newspaper Snowman Art
What you need:
- scissors
- glue
- watercolors or craft paint
- paintbrush
- old newspaper or magazines
- white cardstock
- color paper (brown, orange, and red)
- black paper
- buttons or pompoms
- black marker
Step by Step Tutorial
We’ll be working on white paper – use cardstock or school art paper. You can secure the paper to the desk with tape.


Paint over the whole paper. Have kids use different shades of blue. Purple is another great color choice for winter magic.


Tip: You can also have them make white snowflakes with their fingers as we did in this penguin craft tutorial.
Cut out the snowman body out of newspaper or magazines (the simplest way is to just cut out two circles, one a little bigger than the other).


Apply glue, either to the painted sheet of paper or on one of the circles and stick it onto the painted sheet of paper.


Build the snowman’s body.


Cut out a hat shape out of black paper and stick it onto the snowman’s head.


Cut out a small rectangle out of construction paper (red or other), apply glue onto it (or on the hat).


Stick it onto the hat.


Make the eyes. You can cut them out out of black paper and stick them onto the head, use a marker and draw them, use buttons or use googly eye stickers.


Cut a triangle out of orange paper for the nose and glue it below the eyes.


Next, have the kids draw tiny dots for the snowman’s mouth.


Apply a small amount of glue on the back of the buttons and stick them onto the snowman. You can also use pom poms or paper circles (hole puncher makes great little circles).


Cut two snowman’s arms out of brown paper and glue them to the body. You can also use tiny twigs.


All done!


Want instant access to all of our printable crafts, activities, and resources?


With thousands of crafts, activities, worksheets, coloring pages, and drawing tutorials to print, you will always have just the resource you need at your disposal. Perfect for parents and teachers alike!


