Get ready to splash into summer with this fun ocean wave bottle activity perfect for preschoolers. This delightful project combines sensory play with a splash of science. Creating an ocean wave bottle is not only a fun, engaging activity, but it also offers a unique way to introduce three and four year olds to basic concepts about the ocean and waves. Here’s a step-by-step guide on how to make an ocean wave bottle with preschoolers in the classroom or at home.
RELATED: Ocean Activities for Preschoolers
What you need to make an ocean wave bottle
Here is what you will need to make a preschool ocean wave bottle!


- Clear plastic bottle: Choose a sturdy one with a tight-fitting lid, such as a water bottle or a sports drink bottle.
- Water: Tap water is fine or you can use distilled water.
- Cooking oil: Any clear cooking oil will work, such as baby oil or vegetable oil.
- Blue food coloring: To give the water a vibrant ocean-like color.
- Super glue or duct tape (optional): For securing the lid at the end.
- Glitter or small sea-themed items (optional): Such as tiny seashells, beads, or fish-shaped confetti.
What Kids Learn with an Ocean Wave Bottle
Here are some things you can discuss with your preschoolers as you make this fun homemade wave simulation bottle.


- Oil and Water Science: Discuss why the oil and water do not mix and how this relates to real ocean waves.
- Sensory Play: Allow the children to explore the feel and movement of the wave bottle, which can be very calming and mesmerizing. This Ocean Theme Preschool Sensory Bin is a great way to get little ones involved in ocean exploration.
- Ocean Theme: Use this activity to kickstart a theme about the ocean. Discuss different ocean layers, marine life, and the importance of ocean conservation. Play a fun game of Ocean Bingo to expand vocabulary and learn all about the different types of ocean animals,
Directions for How to Make an Ocean Wave Bottle for Preschoolers
Gather all the materials mentioned above. Make sure your plastic bottle is clean and dry before starting.
Fill the bottle halfway with water. This will be the base of your ocean wave.


Add a few drops of blue food coloring to the water. You can adjust the amount depending on how deep you want the color of your ‘ocean’ to be. Shake gently to mix.


Slowly pour the cooking oil into the bottle until it is nearly full, leaving a little space to allow the liquid to move freely. The oil will float on top of the water, creating a clear separation.
If you choose, sprinkle some glitter or drop in some sea-themed items into the bottle. These will add to the visual effect and make the experience more exciting for the children.


Once your ocean wave bottle is filled, securely fasten the lid. For added safety, you can seal the lid with super glue or wrap it tightly with duct tape to prevent any leaks or spills.
Now, your ocean wave bottle is ready to be shaken, flipped, and turned! Encourage the children to observe how the oil and water interact without mixing, creating a wave-like effect when the bottle is moved.


Creating an ocean wave bottle is an excellent way for preschoolers to explore and learn about the natural world in a controlled, creative setting.


An ocean wave bottle is perfect for sensory tables, science lessons, learning centers, and as a calm-down tool for restless days. Have fun crafting, and enjoy watching your preschoolers marvel at the wonders of their little oceans in a bottle!
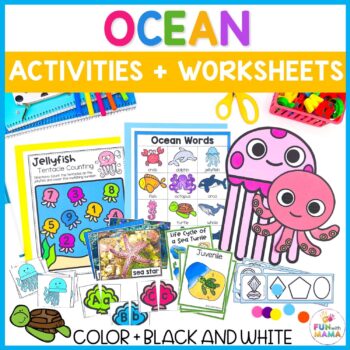
GET THE OCEAN ACTIVITIES AND WORKSHEET PACK


Dive into the amazing world beneath the sea with this Ocean Activities Pack for preschool and kindergarten. Students will explore the alphabet, beginning sounds, sight words, counting to ten, shapes and colors plus so much more! Perfect for use as math or literacy center activities or during whole class lessons, your students will have so much fun while learning about the ocean and the amazing animals that live there.
More Ocean Activities


