
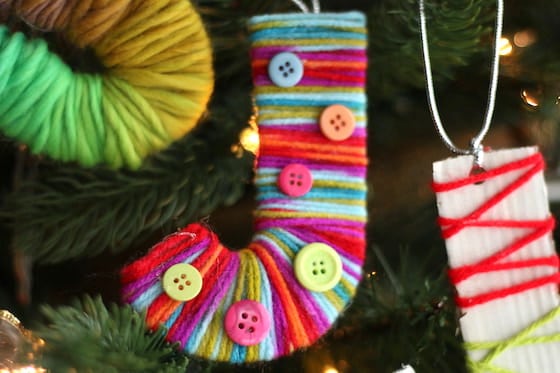
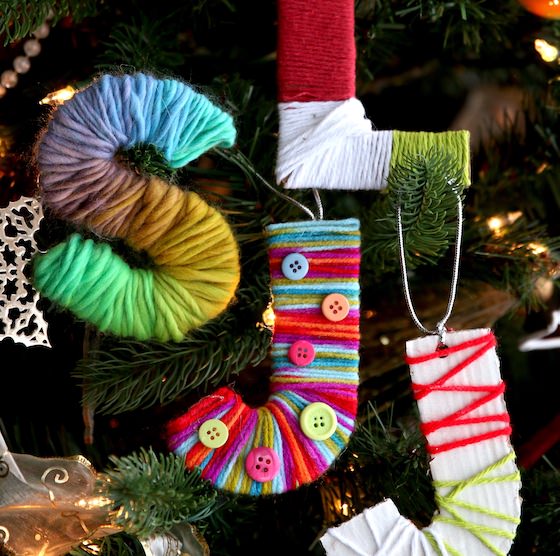
If you’re looking for a quick and easy Christmas ornament for tweens and teens to make today, these Yarn-Wrapped Cardboard Initials are great! All you need is cardboard, yarn and buttons, and you’ll have a personalized letter ornament to hang on the Christmas tree or to give to a friend.
Kids love the first letter of their name, and there are so many different ways to you can make and decorate that letter and turn it into an adorable Christmas ornament. A few ways we’ve done this in the past are these:
We’ve also made these large yarn-wrapped letters for the kids to display on a shelf in their bedroom.
Today’s yarn wrapped initial ornaments are a smaller version of those, and we’ve added some buttons to some of them to make them a little more whimsical.
This is such a fun and easy craft, and it’s great for all ages. It helps to strengthen fine motor skills and co-ordination and it’s a fun way to use up some of the scrap balls of yarn that you have stashed away.
I hope your kids enjoy making these as much as we did!
Supplies:
- cardboard
- pencil/ruler
- scissors
- yarn
- buttons
- glue or low heat glue gun
- hole punch
- thread or yarn for hanging
Instructions:
Time needed: 30 minutes
Yarn-Wrapped Initial Ornaments
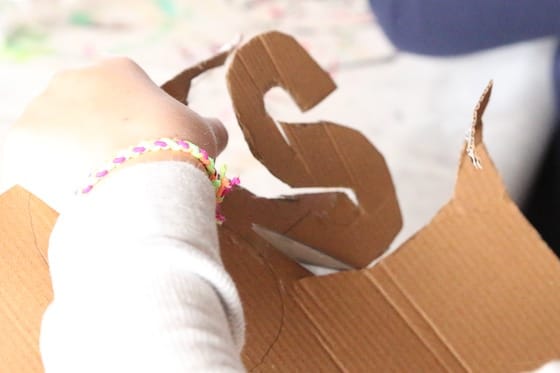
- Draw and Cut Out Your Cardboard Letter
Draw your letter on a piece of cardboard and cut it out. You can do this freehand, or print off a letter template here if you’d rather.
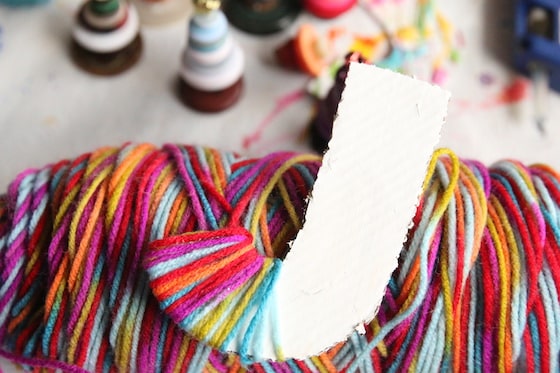
- Wrap with Yarn
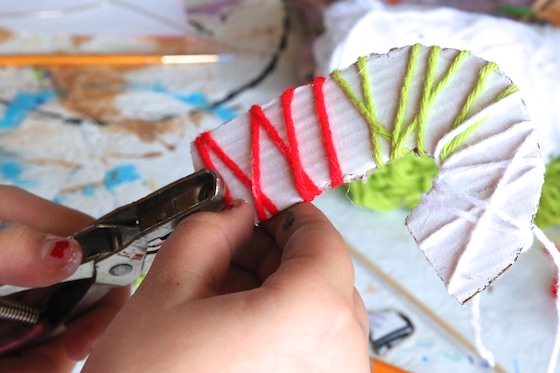
Depending on the letter you’re wrapping, you may want to wrap with one long strand of yarn (working straight from the ball) or you may want to wrap your initial in sections, using several shorter strands of yarn.
When starting to wrap, you can either tape the yarn to the cardboard, or you can just trap that loose end of yarn under as you wrap. To finish, glue the tail of the yarn to the backside of the ornament, or tuck it in with a needle and thread.
Note: Curvy letters are easier to wrap than letters with sharp angles.
- Add buttons
Glue some colourful buttons to the front side of your ornament using white glue or a low-heat glue gun.

- Add a thread for hanging
If the cardboard is bare at the top of your ornament, you can use a hole punch or a sharp pencil to make a hole for the hanging thread. If the cardboard is covered completely in yarn, simply slip your thread under a strand of yarn near the top of the ornament to make your hanging loop.
That’s all there is to it!
Now, go and hang your pretty yarn-wrapped initial ornament on your Christmas tree!
You may also like:
Get the 3-5 Playful Preschool e-Book!
25+ Preschool activities by 25 bloggers, 10 printables, PLUS 50 links to activities not featured in the book.
Click to download your copy now!

Follow the Hooligans on Facebook!

Jackie is a mom, wife, home daycare provider, and the creative spirit behind Happy Hooligans. She specializes in kids’ crafts and activities, easy recipes, and parenting. She began blogging in 2011, and today, Happy Hooligans inspires more than 2 million parents, caregivers and Early Years Professionals all over the globe.


